
Easy DIY Tote Bag with French Seams: A Beginner-Friendly Guide
Welcome to our step-by-step guide on creating a stunning DIY tote bag with our Tote Bag Panels! We have used elegant French seams for this project – and the best part? You won't need an overlocker! Whether you're a seasoned sewing enthusiast or a beginner eager to dive into the world of sewing, this tutorial is tailored just for you.
In this guide, we'll walk you through the process of crafting a durable and stylish tote bag using our Tote Bag Panels, perfect for your daily errands, a casual day out, or as a personalised gift for a loved one. We're excited to feature our Tote Bag Panels, known for their quality and unique designs, which will add a special touch to your creation. Plus, we'll show you how to add robust cotton canvas webbing straps, ensuring your tote is not only chic but also practical.
Our focus is on simplicity, so even if you're new to sewing, you'll find these instructions approachable and easy to follow. And for our visual learners, we've included a video tutorial to guide you through each step.
So, grab your sewing kit, choose your favorite Tote Bag Panels from Custom Fabrics UK, and let's get started on this exciting journey to creating your very own custom tote bag with French seams!
Check out step by step instructions below or you can view our video tutorial here if you're more of a visual learner.
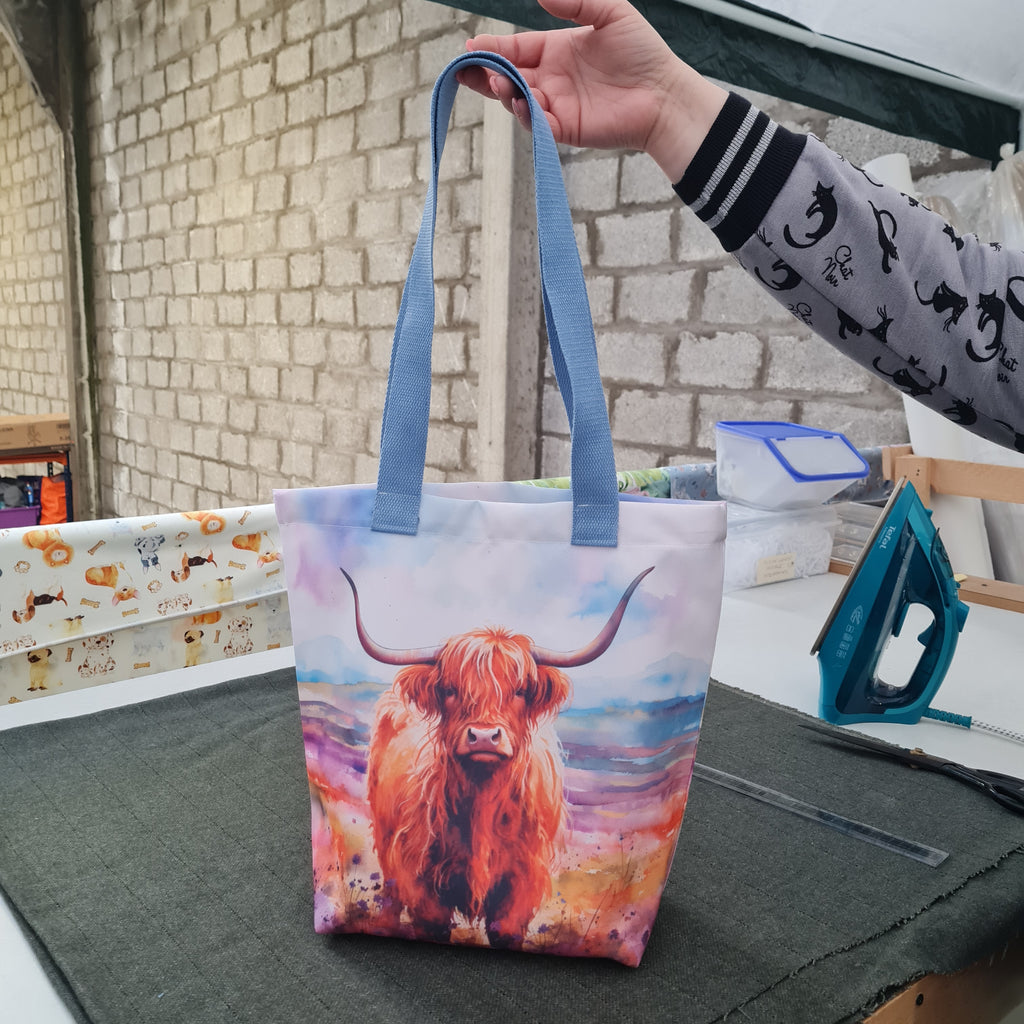
The design we have used for this tutorial is our Watercolour Highland Cow Fabric Bag Panel printed on our Waterproof Canvas fabric base. Check out this design here and you can also find the matching CO-ORD design here.
If you are looking for another design, you can choose from our range over 400 designs and also choose the fabric base of your choice to create the tote bag of your dreams!
We have a wonderful selection of fabrics available for our printed Tote Bag Panels including: Waterproof Canvas, Woven Cotton, Cotton Drill, French Velvet and Upholstery Velvet.
Step By Step Instructions:
1. Pin your panels wrong sides together.
2. Stitch your panels wrong sides together with a 1cm seam allowance.
3. Trim excess fabric off the edges and be careful not to cut into your stitching!
4. Turn the bag wrong sides out, poke out the corners and press.
5. Stitch carefully around the outer edge of the bag with a 1cm seam allowance, this will enclose your first row of stitching and give you clean edges inside and outside of your bag with no raw edges on show. Press again once this step is complete.
6. Measure 5cm squares at the bottom left and right corners of your bag if you would like to have boxed bottoms. You can adjust this to any size of your choice.
7. Cut your squares off the bottom, match your side seam and bottom seam together on each side and pin. Make sure the side seam and bottom are facing opposite directions to create a flat seam for the bottom corners of your bag. This makes it easier to sew over!
8. Stitch the bottom corners closed with a 1cm seam allowance. Trim any excess fabric carefully and turn your bag wrong sides out.
9. Pin your bottom corners into place again and stitch again with a 1cm seam allowance, this will enclose your first row of stitching and give you clean edges inside and outside of your bag with no raw edges on show. Poke the corners out and press again once this step is complete.
10. Carefully fold 1 cm from the top of your bag, then fold again so you have a 3cm fold. This will create a neat edge at the top of your bag. Press into place and pin. Stitch around with 1cm seam allowance to secure.
11. Measure 10cm from each side of your bag to mark where you would like your straps to sit.
12. Pin your straps into place. We suggest using straps of your own preferred length to fit your own shoulder or you can use 75cm length straps which is a good average size for most. You can also use your own hardware and customise as you wish!
13. Straight stitch your handles into place, remember to backtack them and double stitch if you will be carrying anything heavy with your bag.
14. Fold the handles upright for the final stitching. Stitch your handles into place by stitching a square shape. You can add an addition criss-cross shape within the square if you wish. You can now top stitch around your bag and it is complete.
15. Give your bag a final press and you are ready to wear it!
We're thrilled to share this tote bag tutorial with you! Your thoughts and experiences are invaluable to us, so we'd be delighted to hear your feedback. Don't hesitate to share your opinions and suggestions – they help us create even better content for our Custom Fabrics UK community.
And we're not just curious about your thoughts; we're excited to see your creations too! If you've followed along with our guide, please show off your finished tote bag. If you are looking for the design of your dreams, scroll below to view our full range of Tote Bag Panel Designs or click here. Share your masterpiece with us and inspire fellow crafters in our vibrant sewing community. Let's keep the creativity flowing!